Friday, January 8, 2016

How I got from 44 Twitter Followers to over 1300 in one month


Just a few notes on how I managed to massively (for me) up my Twitter Follower count.
First off, I did not use any tools (later, used IF to automate posts, but that's all), nor pay for any followers, I just used a few ideas from others and myself and came up with the plan below and it seemed to work. I actually increase my follower count by over 500 in 5 days between Christmas and the 29th of December 2015. So thought I would share…


07Jan16_Twitter.JPG
Screenshot taken 7th January 2016


So to anyone who has followed me since early December 2015, thanks very much, it is because of you I can write this article. I truly do appreciate the support, retweets and engagement that this journey has taken me on and look forward to much more.


Many of you will have 12k, 20k, 300k followers and quite obviously you all know a lot more than I do about this. I offer nothing on Twitter and do not aim to gain from more followers, however in the interest of transparency, I do have Google Adsense on my blog & website.


Okay, this is how I did it:


  • Follow people


    • Follow people that have the same interests, or that you find interesting.


      • An example here, is that I love photography and art, so have followed many photographers and artist, same as books and authors / publishers, and of course I am a tech nerd so I follow lots of tech.


      • This now puts me in several categories for other looking to follow people interested in art, books and tech, etc..


    • Look for people with a high follow rate ratio
      • There is more chance they will follow you back.


      • Twitter is a quid pro quo online society, and it is polite to follow people that have followed you, helps their follower count and everyone benefits. Now, that does not mean follow everyone that follows you, as their are many inappropriate accounts out there.


      • An example of a high follow rate, if you like their content follow and they most likely will follow back.


FollowRatio.JPG


    • After you follow someone


      • You will be offered other similar people to follow, check these out.


      • If you follow one of these, again you will be offered further similar people to follow and so on.


      • This is a great way to follow authors of a particular genre, or artist or anything for that matter.


    • Use the Twitter site on the PC / laptop


      • It will show 6 people to follow, whereas the app only shows 3.


      • Work up and down the list.


      • This will show you people followed based on who you already follow.


      • Therefore by following some of these people, you inturn will be shown on this list to others.


  • Actively Tweet & Retweet


    • Pick the best times to Tweet


      • When is Twitter mostly used in your area, no point Tweeting about something local at 3am, when there is a low audience.  


      • I believe before just 9 am and just after 6 pm are supposed to be the best times - check yourself!!


      • If aiming at a more international audience, work to their time zones.


    • Tweet items of interest to your followers


      • This may seem obvious, but really very few people are interested in that you “are just relaxing with a coffee”


      • Photos is my thing, so I do try to Tweet the best, may not seem it :)


    • Tweet every day


      • At least 2 or 3 times


      • This can be anything of interest, from a web page, news article or anything, but do try to be active.


      • There are programs that show inactive users, and this will increase your chances of being unfollowed.


    • Retweet and like items of interest


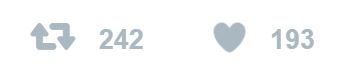
      • Especially if they have a high Retweet_count, this most probably means a lot of people do like the Tweet.


      • An example of a relatively high Retweet and like.

HighCount.JPG


      • Don't be scared to retweet great tweets or photos of relevance, this is what Twitter is about.


  • Use hashtags & mention people


    • Use hashtags


      • This will help people find your Tweet when they search for your hashtag. Example: #Portstewart


    • Mention people of interest


      • They may Retweet, or acknowledge it, which in turn will get your Tweet further exposure. Example: @IMHAPPYteam
(The IM HAPPY team deliver free computing classes in the local Community - www.imhappyni.com)


    • Check what hashtags are trending


      • Use if applicable in your tweet for maximum exposure.

So there you have it, simple basic, but effective. I did put a fair bit of effort into who I followed and checked every single account before I followed them. Some inappropriate accounts did get through, but it was only a handful and I just unfollow as and when they post inappropriate posts.


After I got my Follower count up, I did use IF (IFTTT) to automate post of NASA photo of the day, breaking news and NY Times breaking news. If you seen my photos, you will understand I needed better content :)


If you wish to follow me - @BC_Tweeting

As always, thanks for reading...


keep learning


Thursday, January 7, 2016

IF - Put the internet to work for you - Log all Tweets from a selected area.


In this blog, I aim to show you a nifty little trick that will let you log all tweets from any location. Although, please note that IF can do a lot more than just work with Twitter.

Why would you want to do that?? You may have your own reasons, but other reasons may be to see what people are tweeting about at a conference, festival, disaster area or even an airport. Now, you could search for that location, or keywords, but say some are not using any of the keys words, then you will not get their Tweets.

You can also just set it up to log Tweets from your local area, football grounds or work location. this will give you a great insight to general feeling in the area. I would set it up for Newcastle United's ground, but think I would be overwhelmed with the current negativity :(

As always, there are more than one way to do this and you can actually do geocode searches in Twitter, but you need a way of getting the geocode for the area you want.. The other advantage of logging the Tweets is that you can run your own data analysis on them.

This blog assumes that you have IF (IFTTT), Twitter and Gmail accounts.

So lets get started..


  • Login in to IF and click on My Recipes. Note, you can do a search to see if there are any recipes that work for you.


  • Now click on Create a Recipe.


  • Now you want to set the trigger, in other words if this happens then do something. so click on this


  • You are now presented with all the available channels, either start typing Twitter to search for it or scroll down and select the Twitter icon.


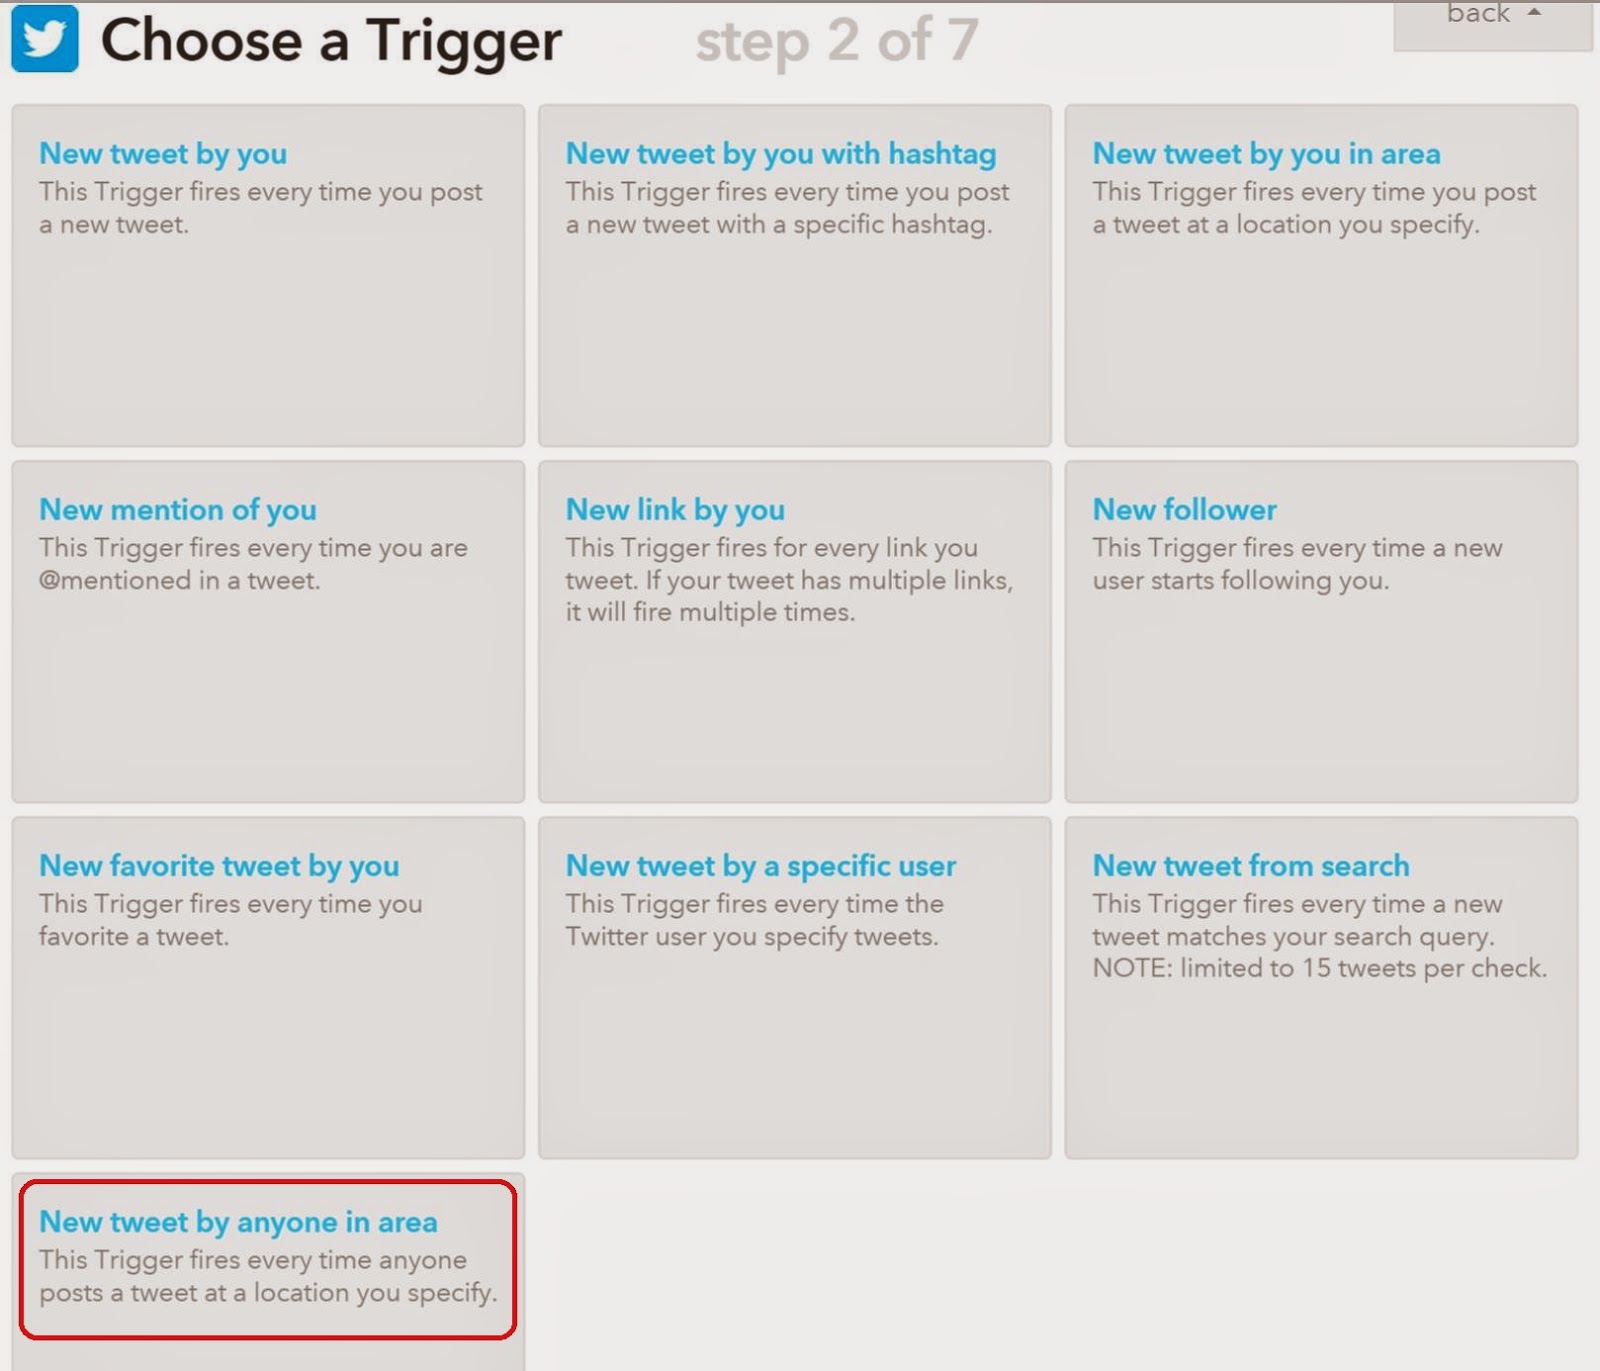
  • You now have several choices of how you wish to trigger the action. We will select the New tweet by anyone in your area.


  • I will create this recipe to record all the Tweets coming from the Titanic Museum in Belfast. So just type the location you are interested in and click on Search.  Now you can set you size of the capture area and then click on Create Trigger.  


  • So that's the trigger set. Now we want to do something useful every time a Tweet is sent from our selected area. In this tutorial, we will record the Tweet and its details to a Google Sheet. So we will set the action by clicking on that.


  • You are now asked to select an action, select Google Drive.


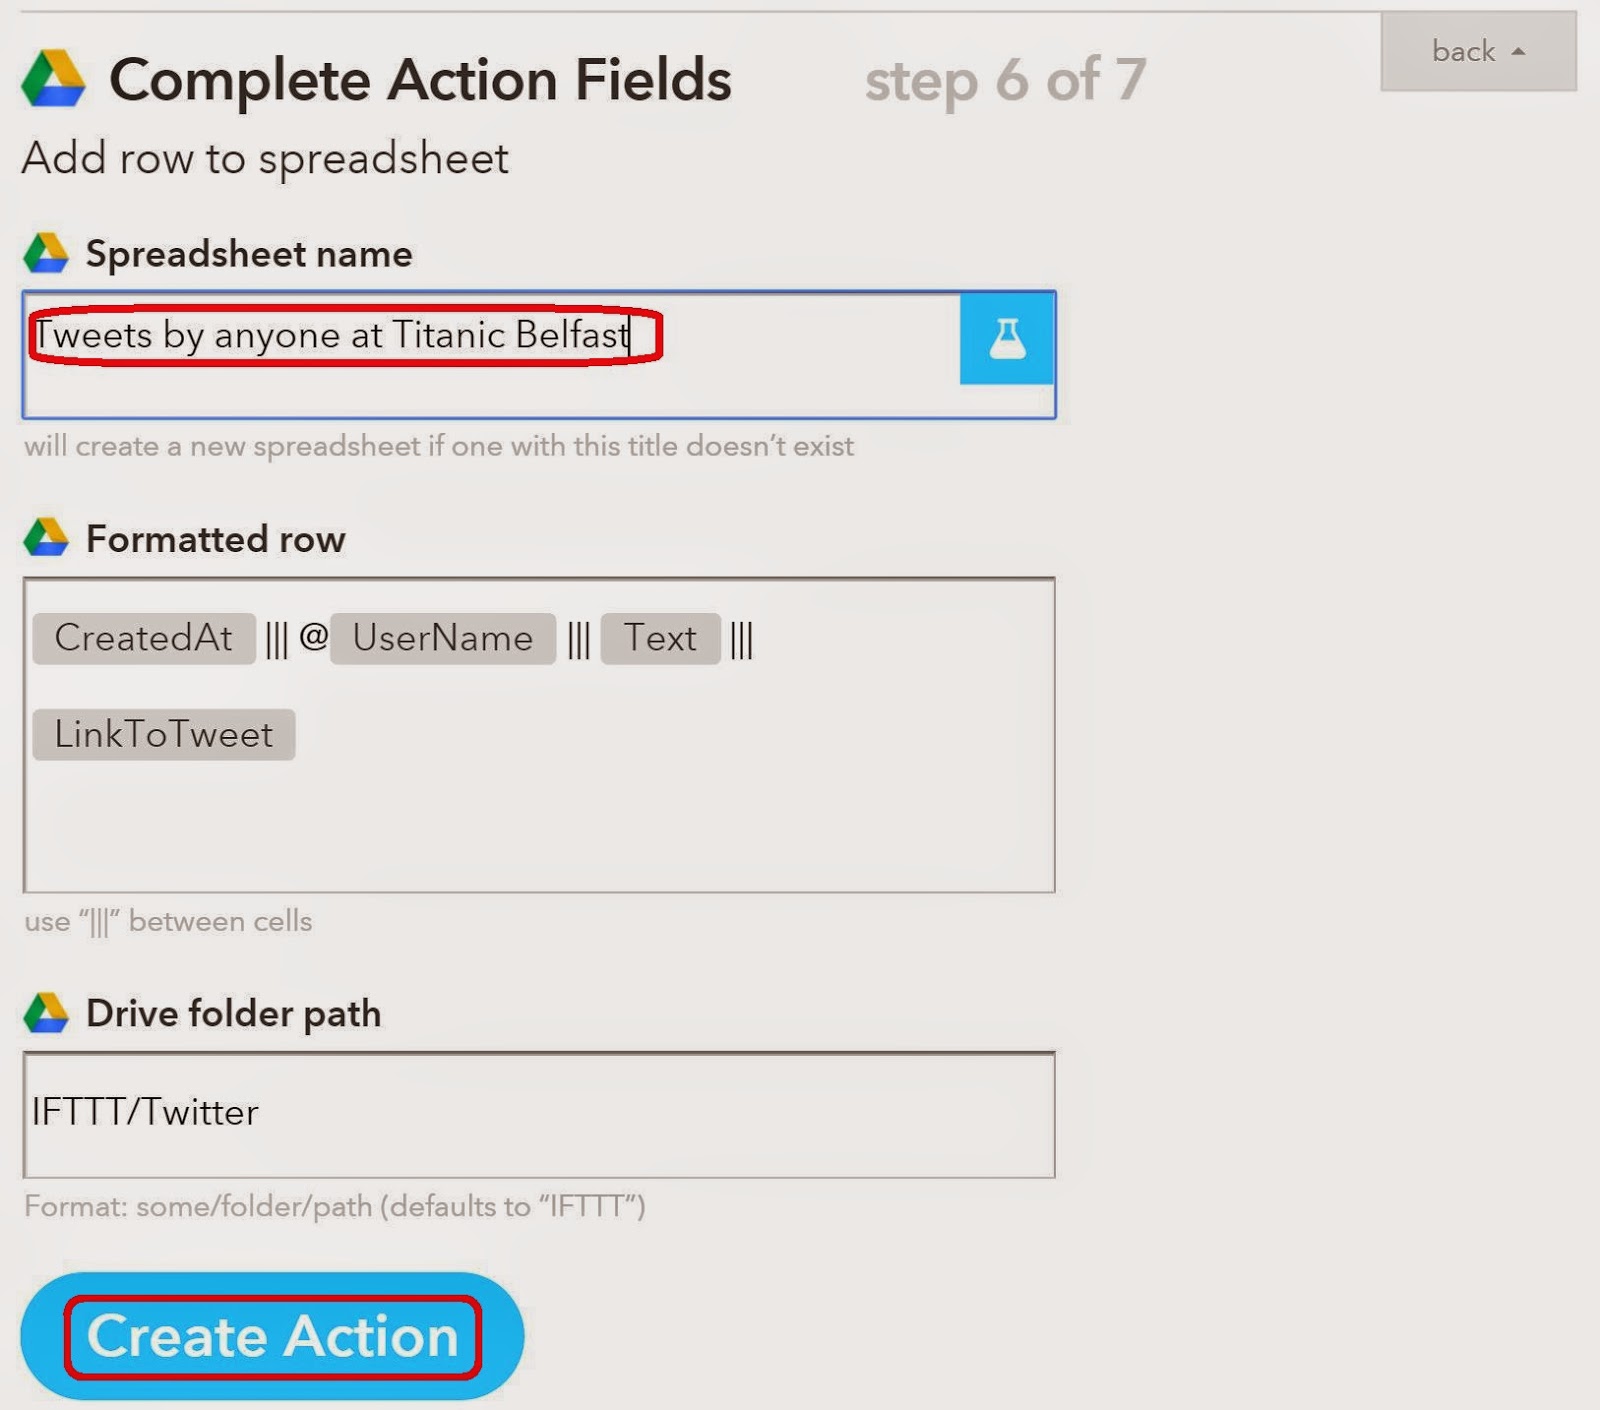
  • When asked which action you wish Google Drive to select click on Add row to spreadsheet. This will actually create the spreadsheet for you and log all Tweets from your selected location.


  • Great, now just name your spreadsheet and click on Create Action.


  • You are now asked to name and create the recipe, almost done. So once you click on Create Recipe it should start logging Tweets from your chosen area. Go to your google drive after a while and see what has been logged..


  • As a point to note, you may want to turn off the Receive notifications when this Recipe runs.


Thanks for reading...


Tuesday, May 5, 2015

Google Forms


In this blog I will give an overview of Google Forms. A few years ago I was desperately looking for something like this and explored various options, all which charged a monthly subscription. The idea behind the forms is simple, you can either link to a form, send it in an email or embed it on your site.

If the form is for my own (or the team's) use I tend to use the link to open a form as a webpage on my mobile, and then save that link to my home screen. Thereafter I (or the team) can easily access the form to enter data. This is then appended to a Google Sheet and can be analysed, edited, etc.


Here is what Google say about Forms:

"Collect RSVPs, run a survey, or quickly create a team roster with a simple online form. Then check out the results, neatly organized in a spreadsheet. 

Get answers to your questions
Create simple or in-depth online surveys. Share them from a link, embed them on your website, or even right inside an email.

Sit back and watch the results come in
All responses to your questions are neatly organized in a spreadsheet, so sorting and analyzing data is a snap.

Access anywhere, anytime
All your form data is automatically organized in Google Sheets and stored in Google Drive. Access them wherever you go, from any device."


Oh, and they are really easy to set up :)

So lets get started.. In this tutorial I am going to set up a very simple survey form, say for an oil company, that is surveying well heads. I will limit the inputs. Using this idea, you could easily make your own survey forms for an environmental agency, estate agent or meter reading for a utility company. This tutorial assumes that you have a google account.


  • Log in to your Google Drive, click on My Drive and select Google Forms from the options displayed.


  • You will now be presented with the following page.


  • Enter the name of the form and the select the question type. I called this form Well Head Survey. The first question was changed to Scale 1 - 5, to describe the state of the well head 1 being very bad and 5 being very good.


  • If you want to add further questions, click on the Add Item button otherwise press Done. I added 3 other questions. Even after pressing Done, you still have the option to add further questions, and the form can always be edited at a later stage also.


  • You also have a few options, which I will not use in this tutorial. They are shown below.


  • You are now ready to send the form. I will show the both result here..


  • As I mentioned, I tend to send the link to my mobile, open it in a browser and then add to home screen so I can easily open the form and submit data quickly. So this is what it looks like on my mobile.. Note that I have taken 2 screenshots and placed them side by side, but hopefully you will get the idea of it being 1 long page. Give Google their dues, it is well presented.


  • Now, I copied the link to create the above, but you can share it as shown below and even create a form to be embedded in your own website.. Now I will enter an email address and show you how it arrives.


  • So here is what it looks like in a Gmail account. Note that if you email application cannot open the form correctly it will offer a link to a webpage to complet the form.


  • That's it, form complete.. You will find the completed data in your Google Drive. 
As always, the best why to learn it is to play about with it and try different things, so enjoy :)


Notes:

  • Never send passwords in Google Forms, or other sensitive information.
  • You will need a data connection to send the form.
  • I personally think it would be good if Google allowed images, or links to them. Then it would be almost perfect. I am sure Google have thought of this and it will happen soon..


Thanks for reading...


Monday, May 4, 2015

IF (was IFTTT) - Put the internet to work for you. Send a Tweet when you publish a Blog.


Check out IF (which was previously known as IFTTTIF This Then That), the url is: https://ifttt.com.


IF is a web based service that operates on triggers that you set, each web service is called a channel and can be triggered or actioned.  

As basic example and one which I will use here to try and explain how useful IF is.

What we will want to happen is for IF to watch my Blogger account for any new posts. When a new blog is posted it will trigger the action of sending a tweet from my Twitter account about the new blog. All automatically. 

I will aim to show you how to set this up in this blog…

All very useful, but that is just the tip of the iceberg, you can have IF monitor all sorts of accounts and carry out an action when a change is detected such as Gmail, Instagram, ebay, etc and even follow your favourite sports teams on ESPN and be alerted, Tweet or log the scores. Although as a supporter of Newcastle United, I defo do not Tweet our scores of late L

So when you set IF to watch for a change and then carry out an action when it is triggered, this is called a recipe, just like cooking.

When you create a recipe, you can publish it, so others can use it with their accounts. This has created a great platform for anyone just starting out with IF, pretty much anything you want to do is already there and free to use or tweak for your own needs.
In fact, if you type "Blogger Twitter" into the search box, it will return many recipes already created which will do this. But if you are more curious and want to see how it works, read on..

IF have created Collections of recipes for ease of use. Some of these Collections include designed for iOS, designed for Android, the online shopper, small business owner and even for the beach goer and nature lovers, to name but a few.

Best to check https://ifttt.com for more details and play about with it..


So, back to the tutorial and what we want to show here is how to automate a Tweet when this Blogger post is published. You will need IF, Twitter and a Blogger accounts.

By now I hope you have already set up an IF account and had a good play about with and maybe even created your recipes, and got hooked on the simplicity and usefulness of IF.

You will need an IF account to follow along, so if not already set up, go to https://ifttt.com  and register.

Now that you are registered with IF, and hopefully already have Blogger and Twitter accounts, let’s get started…


  • Click on My Recipes as highlighted above. This page will list all the recipes that you have created or added to your IF account. You can turn the recipes on and off here (back to supporting Newcastle United, I have turn all relevant recipes off until next session L ). You can also edit your recipes here and create new ones, which we will do here.

  • Now click on the Create a Recipe button.


  • You are now presented with the following screen, click on the word - This.


  • Which in a rather cool way displays the following:


  • The more eagle eyed among you will notice the top of the Blogger icon on the third row, second from the left.
  • Recap - What we want to happen is for IF to watch my Blogger account for any new posts. When a new blog is posted it will trigger the action of sending a tweet from my Twitter account about the new blog. All automatically.
  • Blogger is the Trigger Channel, therefore we will either scroll down to the Blogger icon or search for Blogger and then click on the Blogger icon.
  • As a point to note, this is a good place to browse to see what services are supported by IF.
  • After clicking on the Blogger icon, you will be presented with all the various options to set the trigger. There are only options with blogger which are shown below.


  • For the purposes of this demo, we will chose Any new post by clicking on it. The other option of new post labelled is useful if you only want to tweet about certain posts, not all of them.
  • If you are happy with your selection to proceed. 


  • So basically that is the trigger set, now we have to decide what we want to do when IF is triggered. Again, for this tutorial we will have IF send a Tweet informing that the new blog has been posted.
  • So now click on the word “that”


  • Again in a rather cool way your options will be displayed. I started to search for Twitter and the result was returned after a few letters.


  • Now, simply click on the Twitter icon to set as your action channel. You are now presented with the action options for the Twitter channel.
  • So let’s select Post a tweet with image as the action we want IF to complete.


  • Great, almost done. You are now offered the opportunity to add your own text to the Tweet, but you don’t have to add..
  • Note that IF has automatically inserted the Post Title and the Post Image url, do not overwrite as this are dynamic and created each time the IF runs this recipe.

  • Now click on the Create Action button.


  • You have now told IF what channel to watch for changes and if triggered then carry out an action. All you have to do now is change the title is you want and decide whether to be notified when the recipe is triggered. For the purposes of this, the notifications will be useful, as mentioned I have either turned off the recipes or the notifications of Newcastle United results, maybe be able to turn them on again next year when we start to play better J
  • Now just click on the Create Recipe button and you’re done.


  • The recipe will now show in My Recipes section and can be edited if required.
  • So that’s it, when I post this blog, IF should send a Tweet from my chosen account that I have just posted a new blog. All automatically and pretty cool J
Now, get stuck into IF, have a good play about & Put the internet to work for you 

Thanks for reading...